

Last update:
Configure group–level settings
Aug 21, 2026
After creating a group, you can define and manage group-level settings that include general information about the group, contact support details, user assignments, role assignments and custom attribute configurations.
This section includes the following configuration areas:
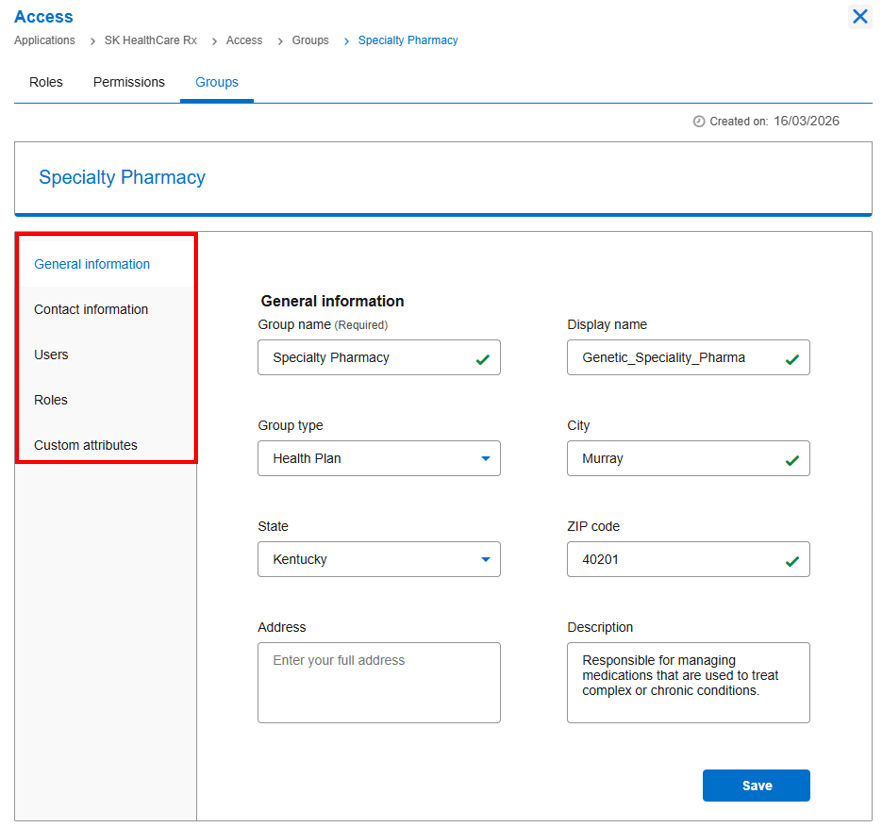
- General Information: View and update basic details about the group.
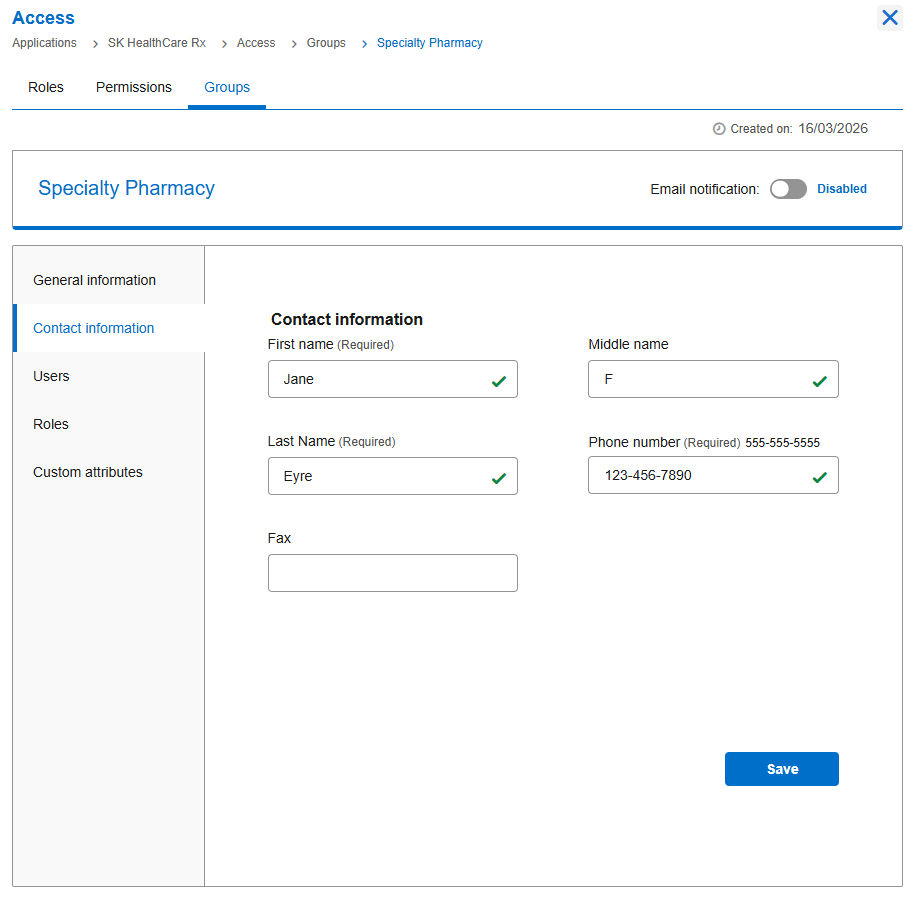
- Contact Information: Add or modify contact details for group-level support.
- Users: Assign or remove users associated with the group.
- Roles: Assign roles to the group. By default, all applications except legacy ones have group inheritance enabled.
- Custom Attributes: View and define additional user attributes for enhanced categorization.
- Data about Data: General Information
- To edit the group information:
- In the left navigation pane, select Applications. Alternatively, you can select View Applications tile on the Dashboard.
- Go to the Access tile and click View & Update.
- Navigate to Groups > General Information.
- Provide the display name for the group.
- Click the dropdown arrow and select the Group Type. ADDITIONAL INFORMATION: Group Type will display a list of categories for the group (also known as Segment or Business Unit) in healthcare.
- Address information (optional): Fill in the address fields to provide location details for the group.
- Address: Enter the full mailing address.
- City: Enter the city name.
- State: Select the state from the dropdown list.
- ZIP code: Enter the ZIP or postal code.
ADDITIONAL INFORMATION: The application owner can search all users within the application. Group owners, however, can only search for users who are part of their specific group or division.
Contact information
This information helps identify the contact support.
- To enter the contact details:
- Go to the Access tile and click View & Update.
- Navigate to Groups > Contact Information and provide the following:
- First Name, Middle Name (optional), Last Name
- Email Address
- Phone Number
- Fax (optional)
- Click Save.
Assign users to group
The Users tab enables you to assign users to specific groups. In applications, users automatically inherit roles, as the group auto-inheritance policy is enabled by default. Users gain membership with default access to all roles within the group. In contrast, for legacy applications, users only gain membership, and you must manually assign access via the Users page.
- To assign users:
- Go to the Access tile and click View & Update.
- Navigate to Groups > Users.
- Click Assign Users. A dialog box will appear notifying users assigned to this group will automatically inherit all associated roles. Click Proceed.
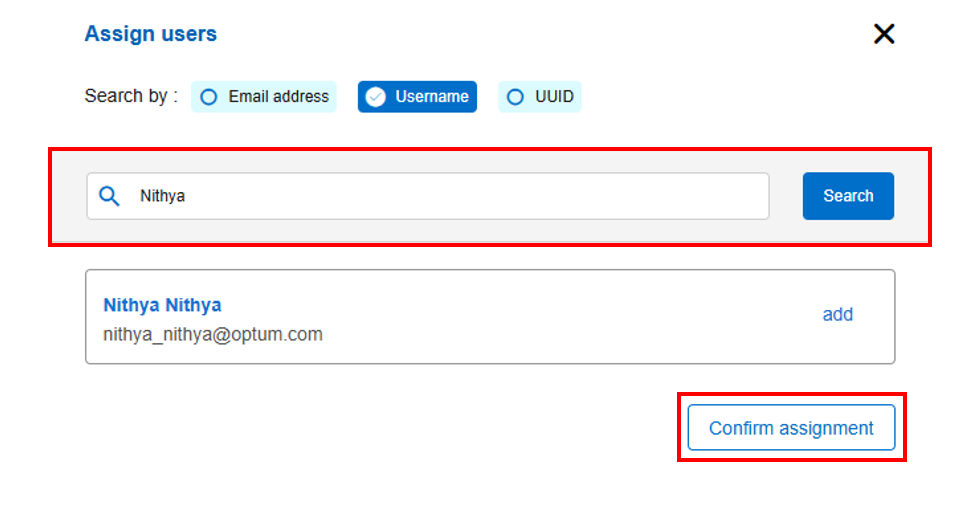
- Select the search type and enter the email address, username, or UUID into the designated search field.
- Click Add against the displayed name and click Confirm Assignment, then click Search. ADDITIONAL INFORMATION: A user may be assigned to multiple groups.
Assign roles to group
Assigning roles to groups streamlines access management and ensures users receive appropriate permissions aligned with their responsibilities. This centralized approach allows application owners to efficiently manage authorization and maintain compliance.
- To assign a role to the group:
- In the left navigation pane, select Applications. Alternatively, you can select View Applications tile on the Dashboard.
- Go to the Access tile and click View & Update.
- Navigate to Groups > Roles and select Assign Role.
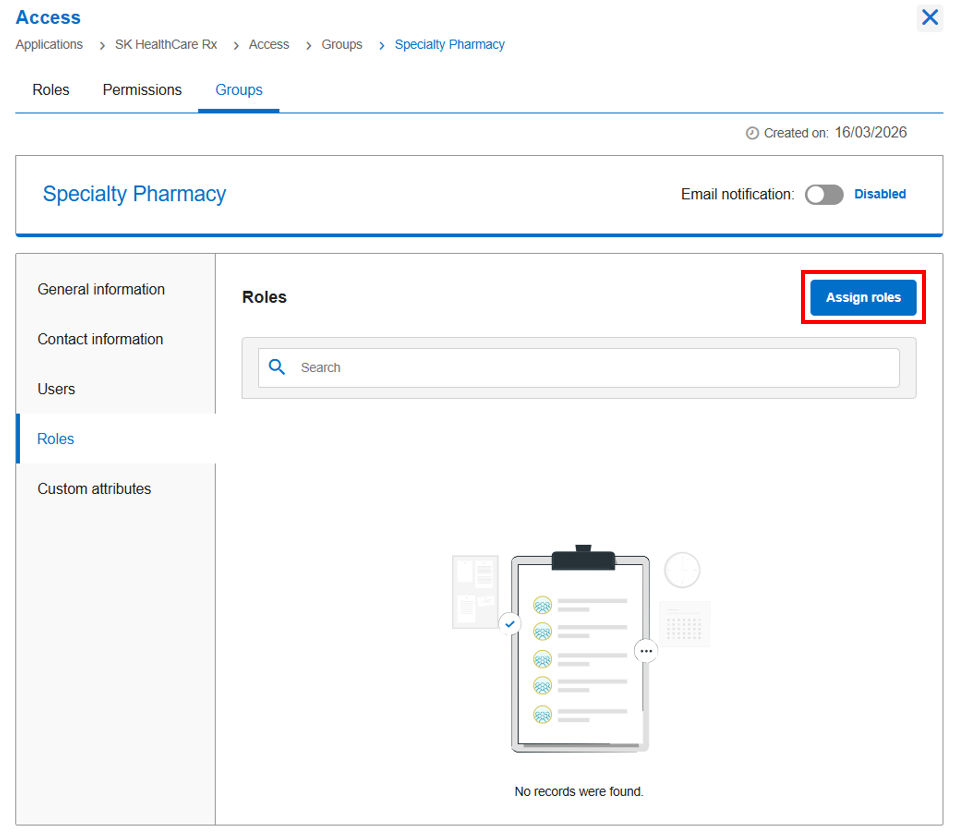
- In the dialog box, enter the role name you wish to assign to the group.
- Click Add next to the required role.
- Note: Review the confirmation message indicating that all group members will inherit the assigned role.
- Click Proceed to continue.
- Select Confirm Assignment to assign the role to the group.
View or add user attributes
User attributes are critical metadata used to personalize access and enforce security policies to access sensitive services associated with a specific group. Typically, these attributes include basic demographic information
- To view/add user attributes:
- In the left navigation pane, select Applications. Alternatively, you can select View Applications tile on the Dashboard.
- Go to the Access tile and click View & Update.
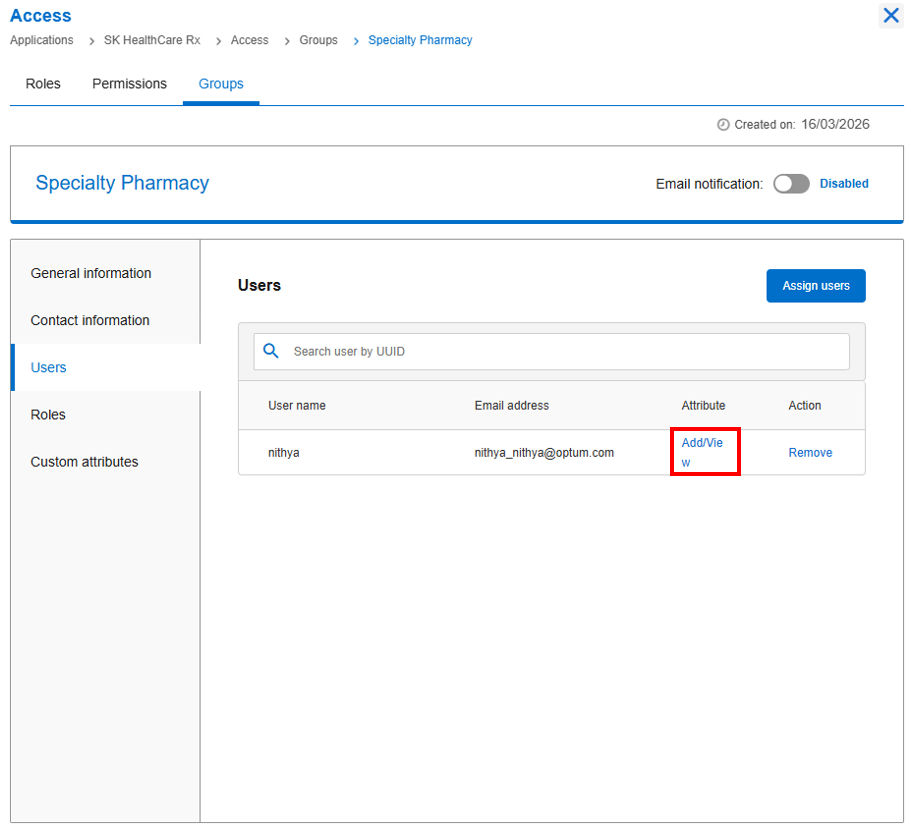
- Navigate to Groups > Users.
- Search for the specific user by UUID.
- Under the Attribute column, click Add/View.
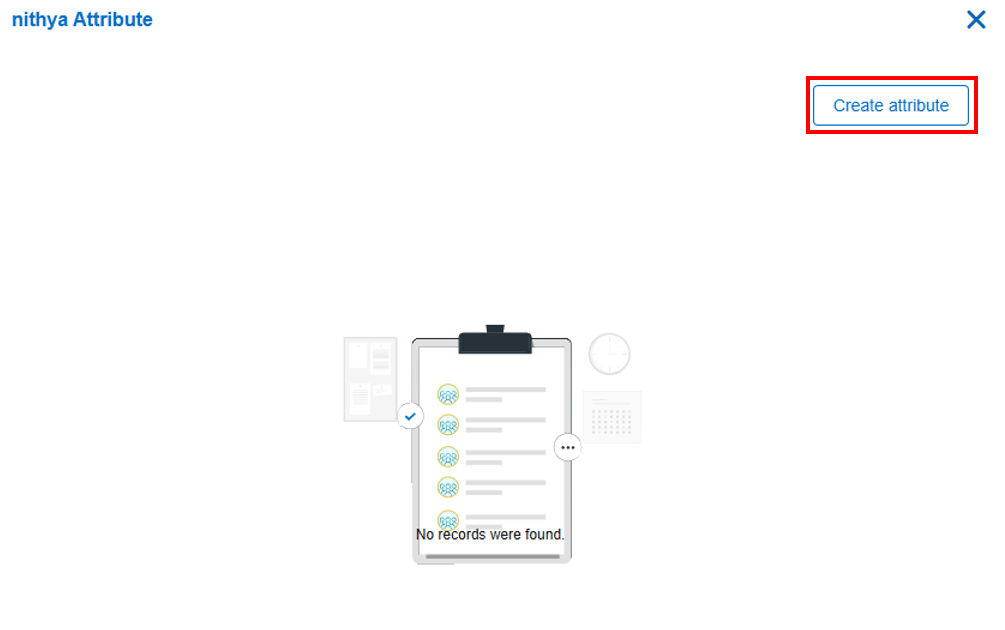
- A new window opens, displaying any existing attributes. To add a new attribute, click Create Attribute.
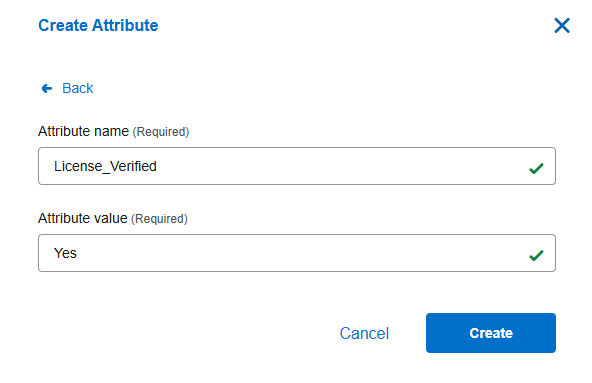
- In the Create Attribute dialog box, enter values for both Attribute Name and Attribute Value, then click Save.
Previous:
Assign a group owner
Share additional feedback to help us improve.
0/255
|
Powered by Aikyam @2025 All rights reserved

+1 866 451 2735
 +1 866 451 2735

+1 855 819 5909