

Last update:
Desktop experience
Aug 21, 2026
This section describes how users set up a passkey on desktop during HSID account creation or after signing in.
Users can set up a passkey on desktop during account creation or after signing in and use it for future sign-ins.
Watch the passkey experience on desktop in action:
New users
A new user creates an HSID account and sets up a passkey during account creation on a desktop. The user can choose to set up the passkey on a mobile device or on the desktop device.
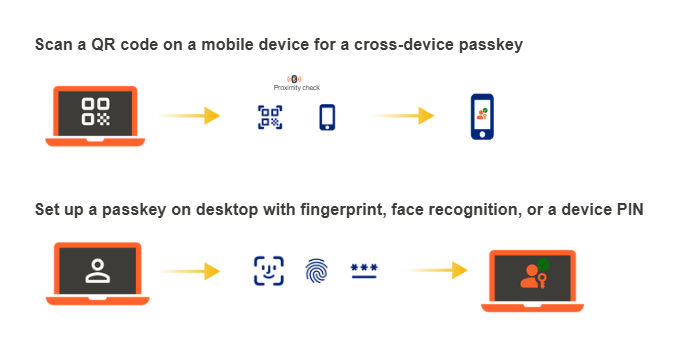
Set up a passkey during account creation
- The user visits an HSID‑enabled portal on a desktop browser.
- The user enters basic details and verifies their email address and phone number.
- Depending on the portal, the user may need to enter an identifier to verify the account.
- The user creates a password and completes the account setup.
- Next, the user is prompted to set up a passkey for future sign‑ins. The user can choose one of the following setup options:
- Set up passkey using a mobile device (Cross‑device)This option allows the user to store the passkey on a mobile device.
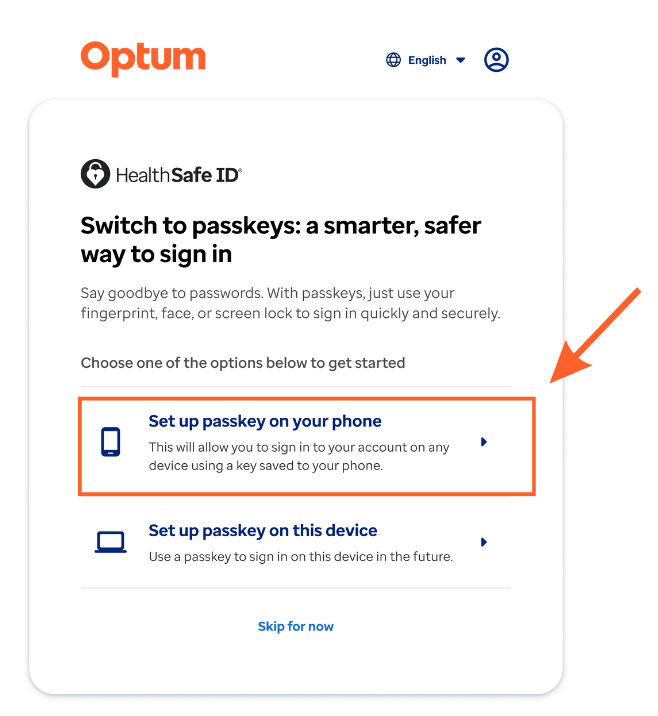 Note: HSID and passkey screens shown are representative and for reference only - final design and content may vary by portal and device.
- The user selects "Set up passkey on your phone" to set up a passkey using another device.
- A QR code is displayed on the desktop screen. The user turns on Bluetooth and scans the QR code using their mobile device.
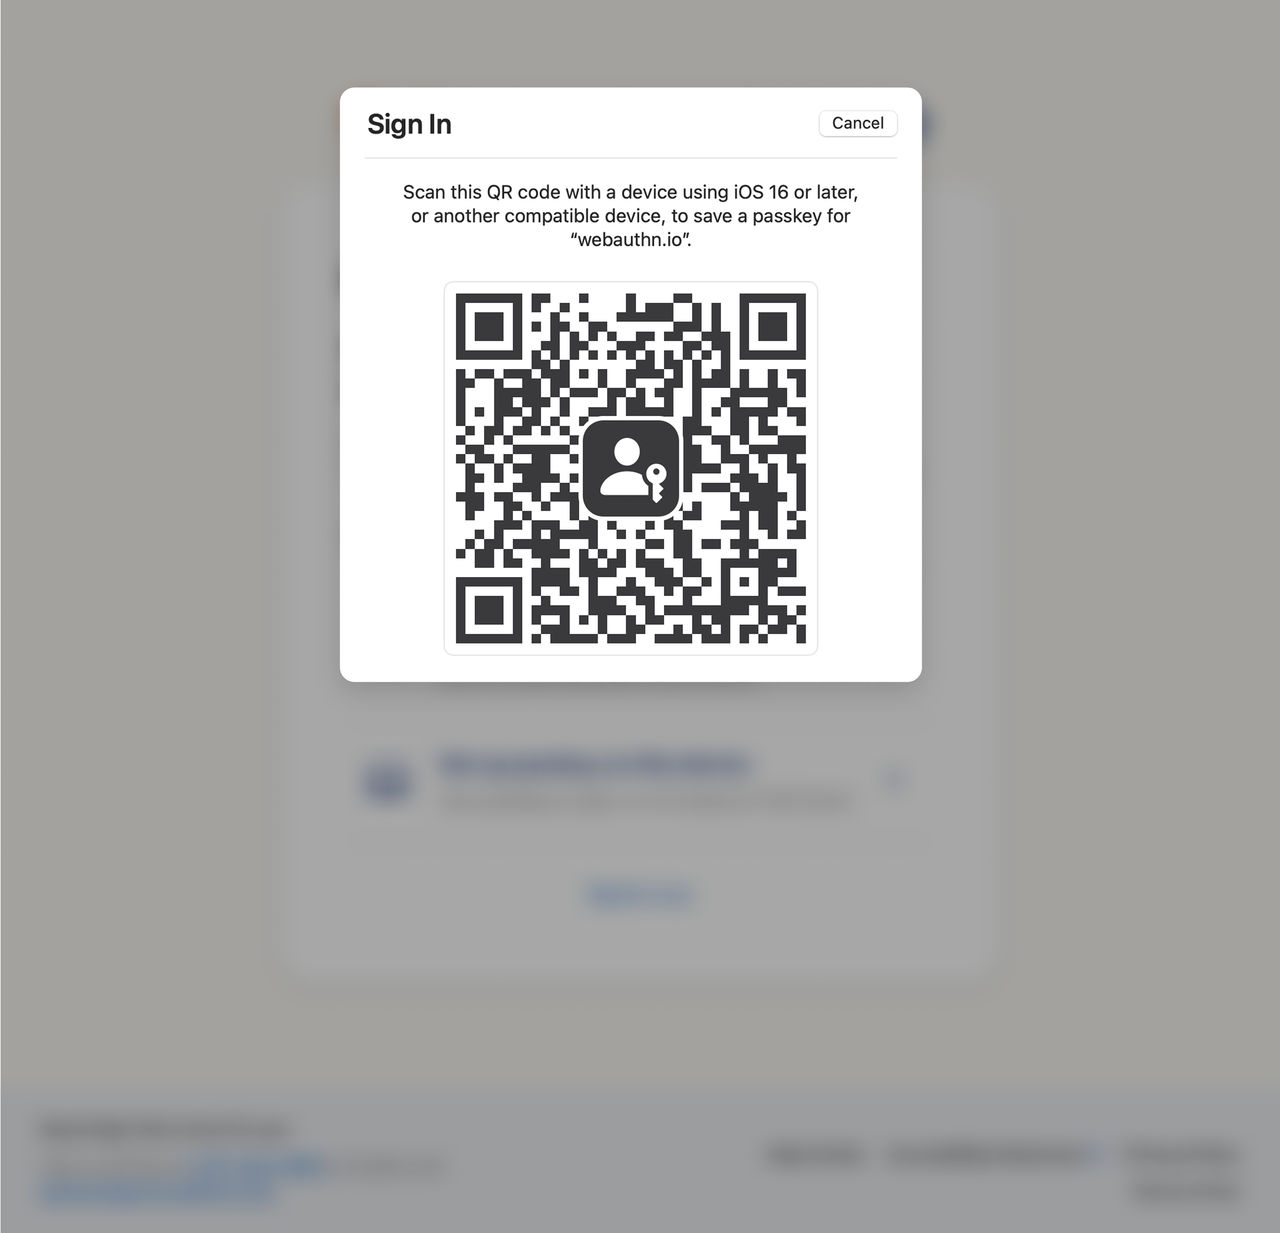
- The mobile prompts the user to authenticate using biometrics (for example, Face ID). Once authenticated, the passkey is securely created on the mobile device.Note: Passkey authentication depends on the user security settings and preferences. Depending on the device and OS, the passkey may be stored locally or synced via iCloud Keychain or Google Password Manager.
- Set up passkey on the desktop deviceThis option creates a device‑bound passkey on the current desktop device.
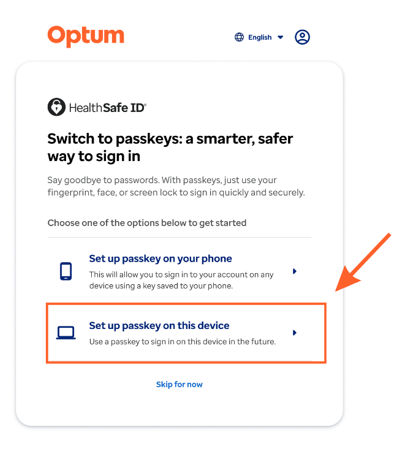
- The user selects the option to set up the passkey on the desktop device.
- The system prompts for biometric authentication (for example, Touch ID) or a device PIN.
- The user enters a device name, authenticates, and completes the passkey setup.The passkey is now created and securely stored on the desktop device.
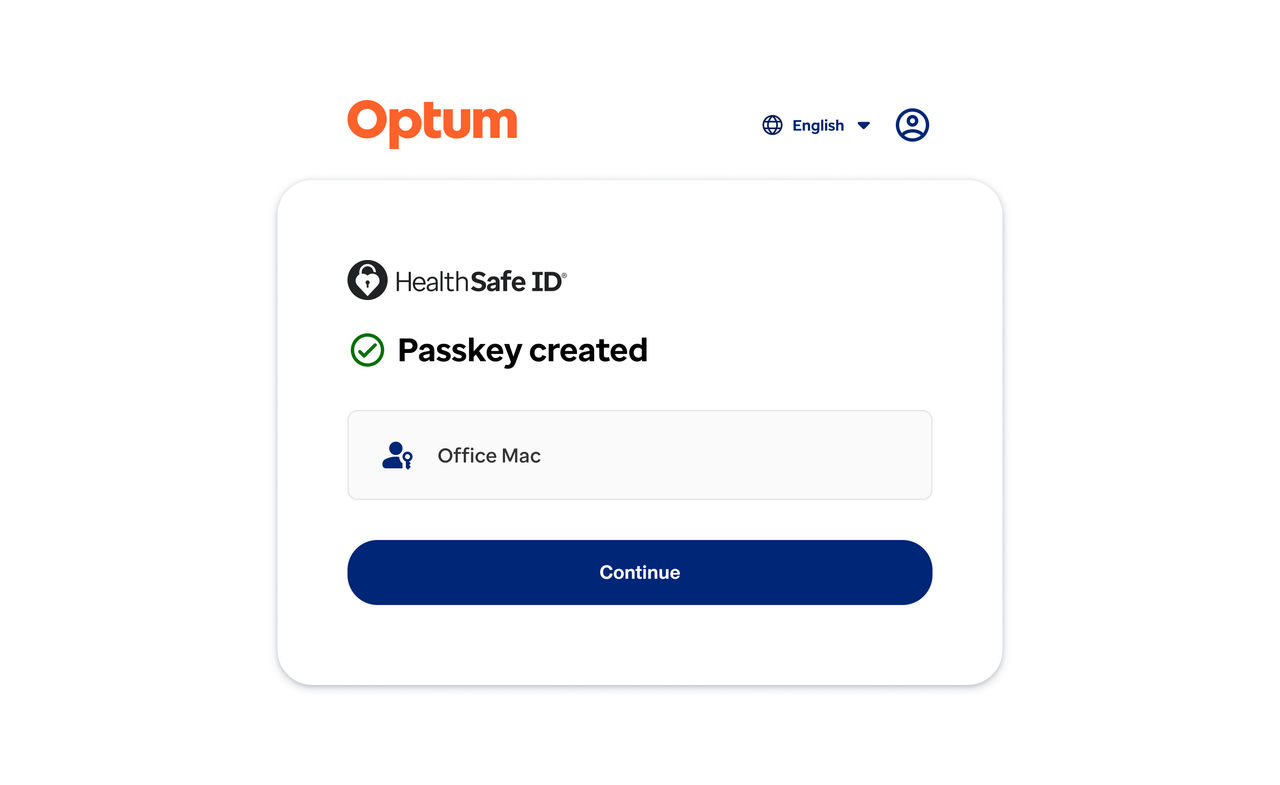
- Set up passkey using a mobile device (Cross‑device)
After the setup, the system redirects the user to the portal. The user can now sign in using the passkey without entering a password.
Sign in using a passkey
Once a passkey is set up, the sign‑in experience becomes simple and consistent.
Sign‑in from the same device
- The user opens the HSID sign-in page and selects the email field to view available passkeys.
- The user selects an account from the browser’s password manager.
- The system prompts for biometric authentication (for example, Touch ID), and the user is signed in.
Sign‑in using a passkey stored on another device
If the passkey is stored on a mobile device:
- On the sign-in page, the user selects Use a different passkey, then chooses Use a phone or tablet.
- The user scans the QR code using a mobile device and completes biometric authentication to sign in.
Existing users
An existing user can set up a passkey after signing in with current credentials.
Passkey setup during sign-in
- The user enters the email address and password.
- The user completes MFA (for example, email and phone verification). Depending on the portal, the user may need to enter an identifier to verify the account.
- After verification, the user is signed in.
- After sign-in, the user sees a prompt to set up a passkey for future sign-ins.
- The setup flow is the same as for new users. The user can choose to set up the passkey on a mobile device or on the desktop device.
After setup, the user can sign in using the passkey without entering a password.
Previous:
Mobile experience
Next:
Manage passkeys
Share additional feedback to help us improve.
0/255
|
Powered by Aikyam @2025 All rights reserved

+1 866 451 2735
 +1 866 451 2735

+1 855 819 5909